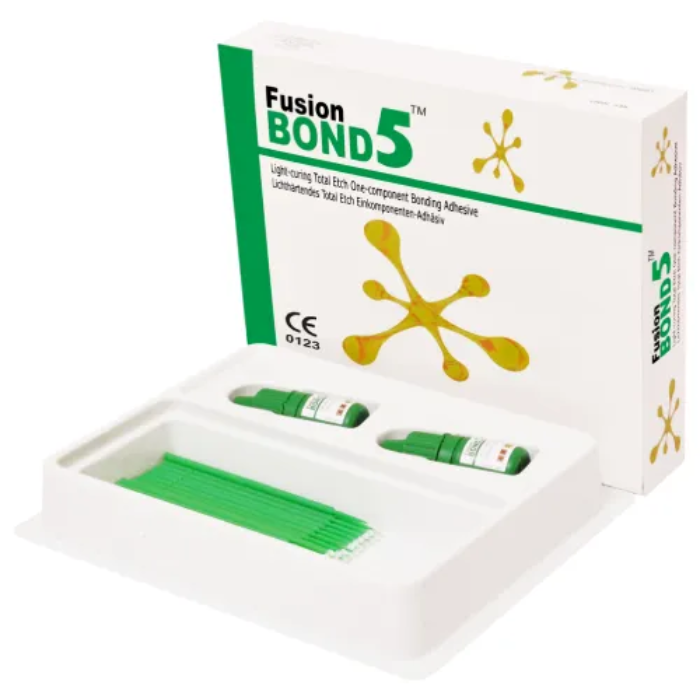
Prevest Fusion BOND 5
Fusion Bond 5 is a 5th generation multifunctional, light cured, one component dentine/enamel bonding agent. It has excellent adhesion to tooth tissue and composite resin. One bottle system, easy to use and can be applied to both dentine and enamel
Fusion Bond 5 / Fusion Total Etch Bond is a light curing, single component bonding agent for use in combination with adhesive restorations. Fusion Bond 5 / Fusion Total Etch Bond adhesive was developed for bonding composites and compomers to the tooth structure as well as for bonding amalgams and indirect restorations (e.g. porcelain). It primes and bonds in one step.
Fusion Bond 5 is a blend of resin-difunctional monomers acrylates, curing initiators, stabilizer and nano silica in tertiary butanol/ethanol/water base.
Prior to the application of Fusion Bond 5 / Fusion Total Etch Bond the tooth structure is conditioned with Actino Etch gel 37%. By mixing Fusion Bond 5 / Fusion Total Etch Bond adhesive with Fusion Self-Cure Activator, a universal, dual cure self-priming dental adhesive system is obtained. This system is designed to bond dual or self-cured composites to enamel, dentine and restorative materials even in areas inaccessible to light.
Indications :
Direct restoration with composite restoratives for all cavity classes
Adhesive luting of crowns, bridges, inlays, onlays and veneers with resin cements
Universal adhesive for light-curing and self-curing composites
Features:
- Simple to use one step bonding material
- Excellent adhesion to dentin and enamel
- Long-lasting bonding strength
- Excellent wettability- Excellent marginal ability
- Universal for all restoratives
- Low film thickness
| Technical Specification | Technical Data
Composition :
Storage Conditions :
|
|---|
Economy pack :
- 2 x 5ml Squeeze Bottle
- 40 x Micro Brushes
Intro pack :
- 1 x 5ml Squeeze Bottle
1. Isolation: Rubber dam is the preferred method of isolation.
2. Cavity preparation: Prepare cavity with minimal tooth reduction. Bevel cavo surface enamel margins.
3. Etching: Apply etchant to enamel and dentin. Wait 15 seconds. Rinse for 10 seconds. Blot excess water using a cotton pellet or mini-sponge. The surface should appear glistening without pooling of water.
4. Adhesive: Immediately after blotting, apply 2-3 consecutive coats of adhesive to etched enamel and dentin for 15 seconds with gentle agitation using a fully saturated applicator. Gently air thin for 5 seconds to evaporate solvents. Light cure for 20-30 seconds.
5. Restorative placement, cure and finishing: Refer to manufacturer's instructions for placement, cure and finishing of restorative materials
Bonding porcelain veneers :
1. Silane treatment: Porcelain bonding surfaces should have been etched using hydrofluoric
acid by the dental laboratory. Apply Ceramic Primer to the bonding surface of the veneer. Dry for 5 seconds. Clean the prepared teeth in preparation for seating and bonding using a plain pumice slurry. Rinse thoroughly and dry.
2. Etching: Apply etchant to both enamel and dentin. Wait 15 seconds. Rinse for 10 seconds. Blot excess water using a cotton pellet or mini-sponge. The surface should appear glistening without pooling of water. An additional 15 second etch time may be appropriate for teeth that were not prepared using a diamond bur. Residual organic matter can also require additional etch time.
3. Adhesive: Immediately after blotting, apply 2-3 consecutive coats of adhesive to etched enamel and dentin for 15 seconds with gentle agitation using a fully saturated applicator. Gently air thin for 5 seconds to evaporate solvents. Do not light cure.
4. Adhesive application to veneer: Apply 1 coat of adhesive to the acid etched, silane treated veneer. Dry thoroughly. Do not light cure.
5. Luting material application to veneer: Apply luting Cement to the bonding surface of veneer.
6. Seating and curing: Carefully seat the veneer. Clean excess luting cement from the veneer margins. Cure each area of the veneer for times recommended by the luting cement manufacturer. We recommend curing the gingival margin first, followed by the body and the incisal margin. Avoid direct contact with the light-guide during initial curing.


