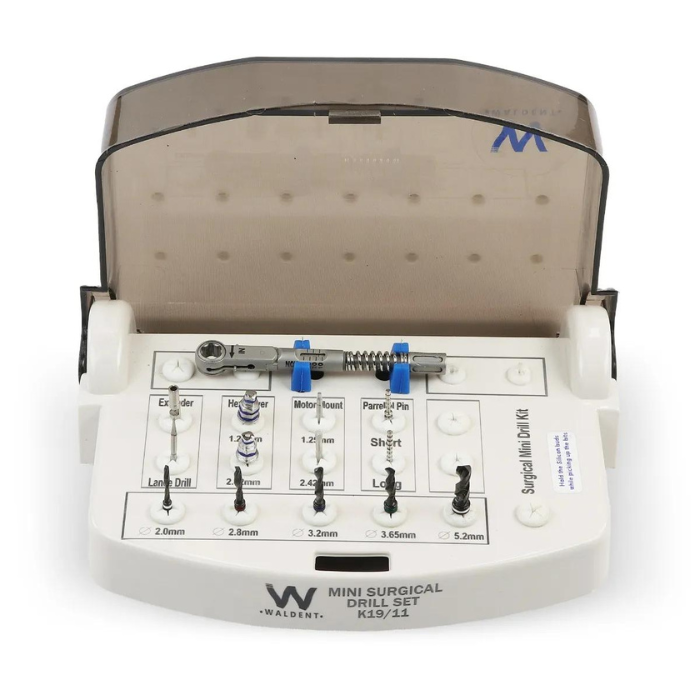
Waldent PrecisionPro Implant Drill Set 15-PCS (K19/10)
Waldent PrecisionPro Implant Drill Set 15-PCS (K19/10), a comprehensive kit designed to elevate your implant placement procedures to new levels of precision and efficiency. Number of PiecesCrafted meticulously with the needs of dental professionals in mind, this set features drill bits with stoppers, offering unparalleled versatility for a wide array of treatment procedures in implant placement cases. With all the necessary instruments conveniently housed within, this set ensures seamless execution of standard surgical procedures, making it an indispensable tool in any dental practice. The drill bits, available in various sizes including ø2.0mm, ø2.8mm, and ø3.2mm, provide the utmost accuracy and reliability during surgical procedures. Additionally, the inclusion of stoppers empowers dentists with precise control over drilling depth, enhancing procedural accuracy and patient outcomes.
Delivery Time3 to 5 days
- Variety of drill bit sizes available
- Stopper for precise drilling depth control
- High-quality medical-grade material
- Durable and reusable
- Latch type drill bits
- Convenient storage box
- Suitable for standard surgical procedures
| Technical Specification |
|
|---|
- 1 x Drill Bits With Stopper 15-PCS SET
Here are the directions for using the Waldent PrecisionPro Implant Drill Set 15-PCS (K19/10):
- Prepare the Work Area: Ensure that the dental chair and surrounding area are clean and properly set up for the procedure. Sterilize all instruments and ensure they are easily accessible.
- Select the Appropriate Drill Bit: Choose the drill bit size and length according to the specific requirements of the implant placement procedure. Refer to the patient's treatment plan and anatomical considerations for guidance.
- Insert the Drill Bit: Securely attach the selected drill bit to the handpiece of the dental drill. Ensure that it is properly seated and locked in place to prevent slippage during the procedure.
- Position the Patient: Position the patient comfortably in the dental chair, ensuring proper access to the treatment area. Use appropriate dental dams or other isolation techniques as needed to maintain a clean and dry surgical field.
- Anesthetize the Patient: Administer local anesthesia to the patient as per standard protocols to ensure their comfort and minimize discomfort during the procedure.
- Mark the Drilling Depth: Use the stoppers provided with the drill bits to mark the desired drilling depth on the implant site. Adjust the position of the stopper on the drill bit shaft according to the planned depth of implant placement.
- Commence Drilling: Begin drilling at the marked site with steady, controlled movements. Use a consistent speed and pressure to avoid overheating or damaging the surrounding bone tissue.
- Monitor Depth and Progress: Continuously monitor the drilling depth using the stopper as a reference. Adjust the drilling depth as needed to ensure accurate placement of the implant.
- Complete the Procedure: Continue drilling until the desired depth and preparation of the implant site are achieved. Take care to maintain proper irrigation and cooling throughout the procedure to prevent overheating and tissue damage.
- Post-Procedure Care: Once the drilling is complete, carefully remove the drill bit from the handpiece and dispose of any disposable components according to biohazard waste disposal protocols. Clean and sterilize reusable instruments for future use.
- Follow-Up: Provide appropriate post-operative instructions to the patient and schedule follow-up appointments as needed to monitor healing and ensure the success of the implant placement procedure.


